
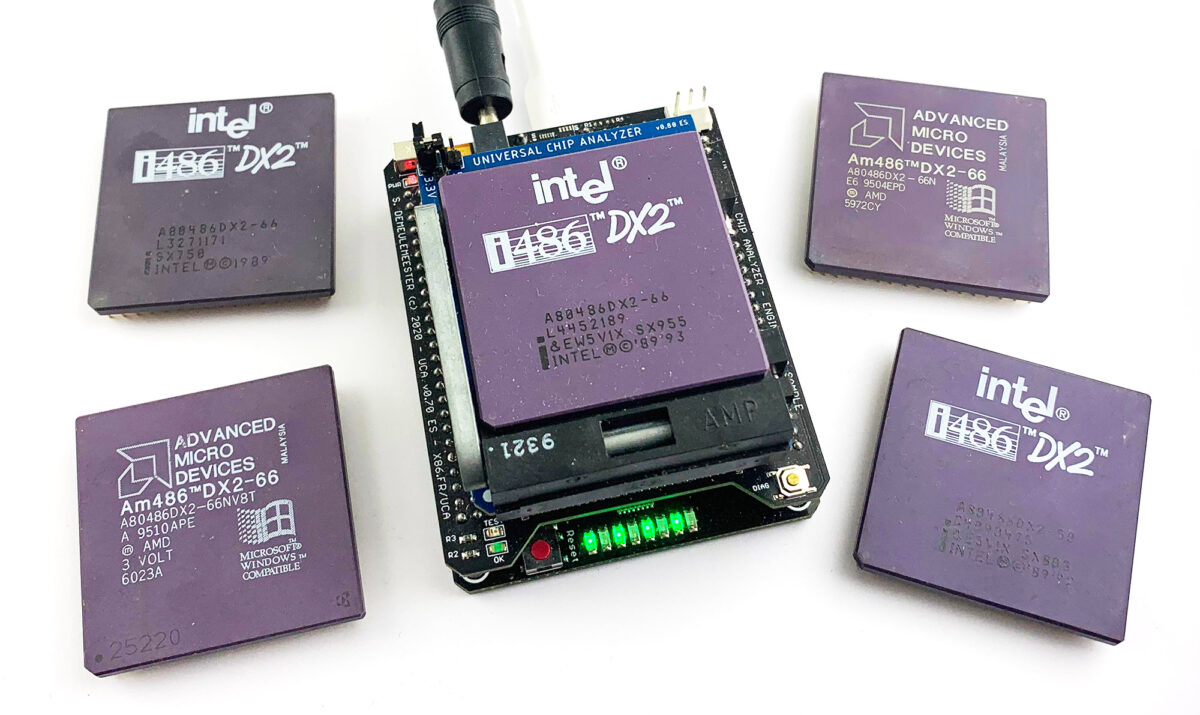
While developing the 486 Adapter for the Universal Chip Analyzer, I was worrying about how to distinguish between early CPUs from AMD and Intel (the ones without CPUID instruction support). There is no way to distinguish them because they’re basically the exact same chip: same microcode, same architecture, same power consumption, etc. AMD used the Intel’s die for its whole early 486 line and only the external packaging was different. Thus, no BIOS nor any software detection tool can distinguish between an early AMD Am486DX2-66NV8T and an Intel 486 DX2-66. Both even share the same ID set in EDX register at boot.
 I carefully read the datasheets and finally found a small difference between them. It’s located in the JTAG controller, embedded in all AMD 486s and Intel 486s starting with the DX-50. The JTAG controller is used as an internal test tool since the late 80s, standardized in 1990 as IEEE 1149.1 (“Standard Test Access Port and Boundary-Scan Architecture“). It’s now an industry-standard feature present in all complex ICs for debugging purposes. JTAG was commonly used in the 90s to remotely sense the state of all hardware pins with the ability to toggle them individually between 0, 1 and High-Z (floating).
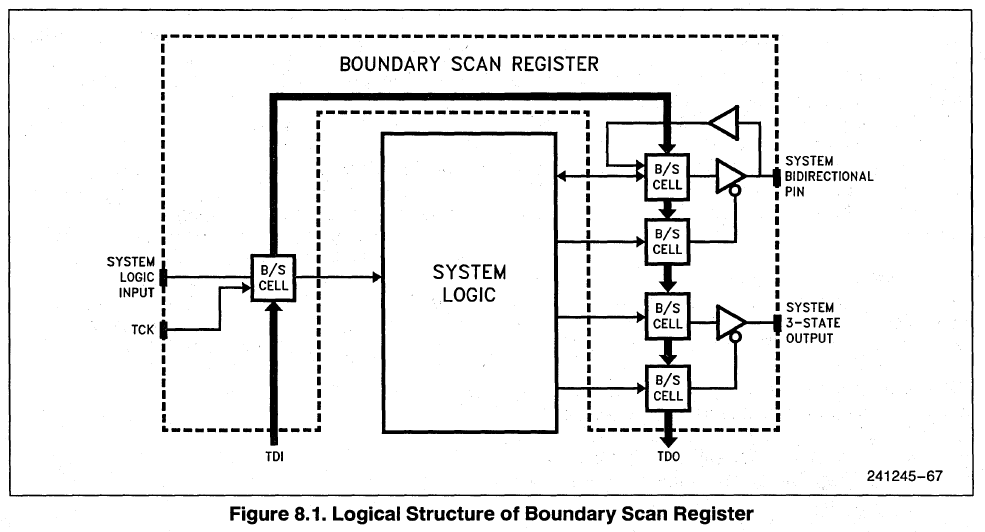 The JTAG controller is generally totally isolated from the CPU: you can’t access any of the internal test features nor test registers from the code running on the CPU. (Some years ago, Intel added a feature to access JTAG from USB, which caused some serious vulnerabilities). Back in the 90s, JTAG access had to be done from dedicated CPU pins called the TAP (Test Access Port). The TAP uses 3 input pins (TMS for Chip Select, TCK for Clock and TDI for Data Input) and one output pin (TDO for Data Output). JTAG has been designed to daisy chain many ICs (boundary-scan).
The basic early JTAG implementation in 486s supports 5 instructions:
-
- (0000b) EXTEST – Arbitrary setting of pins on the CPU to a given state (0, 1, Z)
- (0001b) SAMPLE – Poll and report the status of all CPU pins.
- (0010b) IDCODE – Used for chip identification
- (1000b) RUNBIST – Launch the internal self-test, built-in on all CPUs since the 386s
- (1111b) BYPASS – Connect TDI with TDO to bypass the chip (when talking with another IC in the chain)
According to Intel’s datasheet, the IDCODE instruction reports a 32-bit register with the following format:
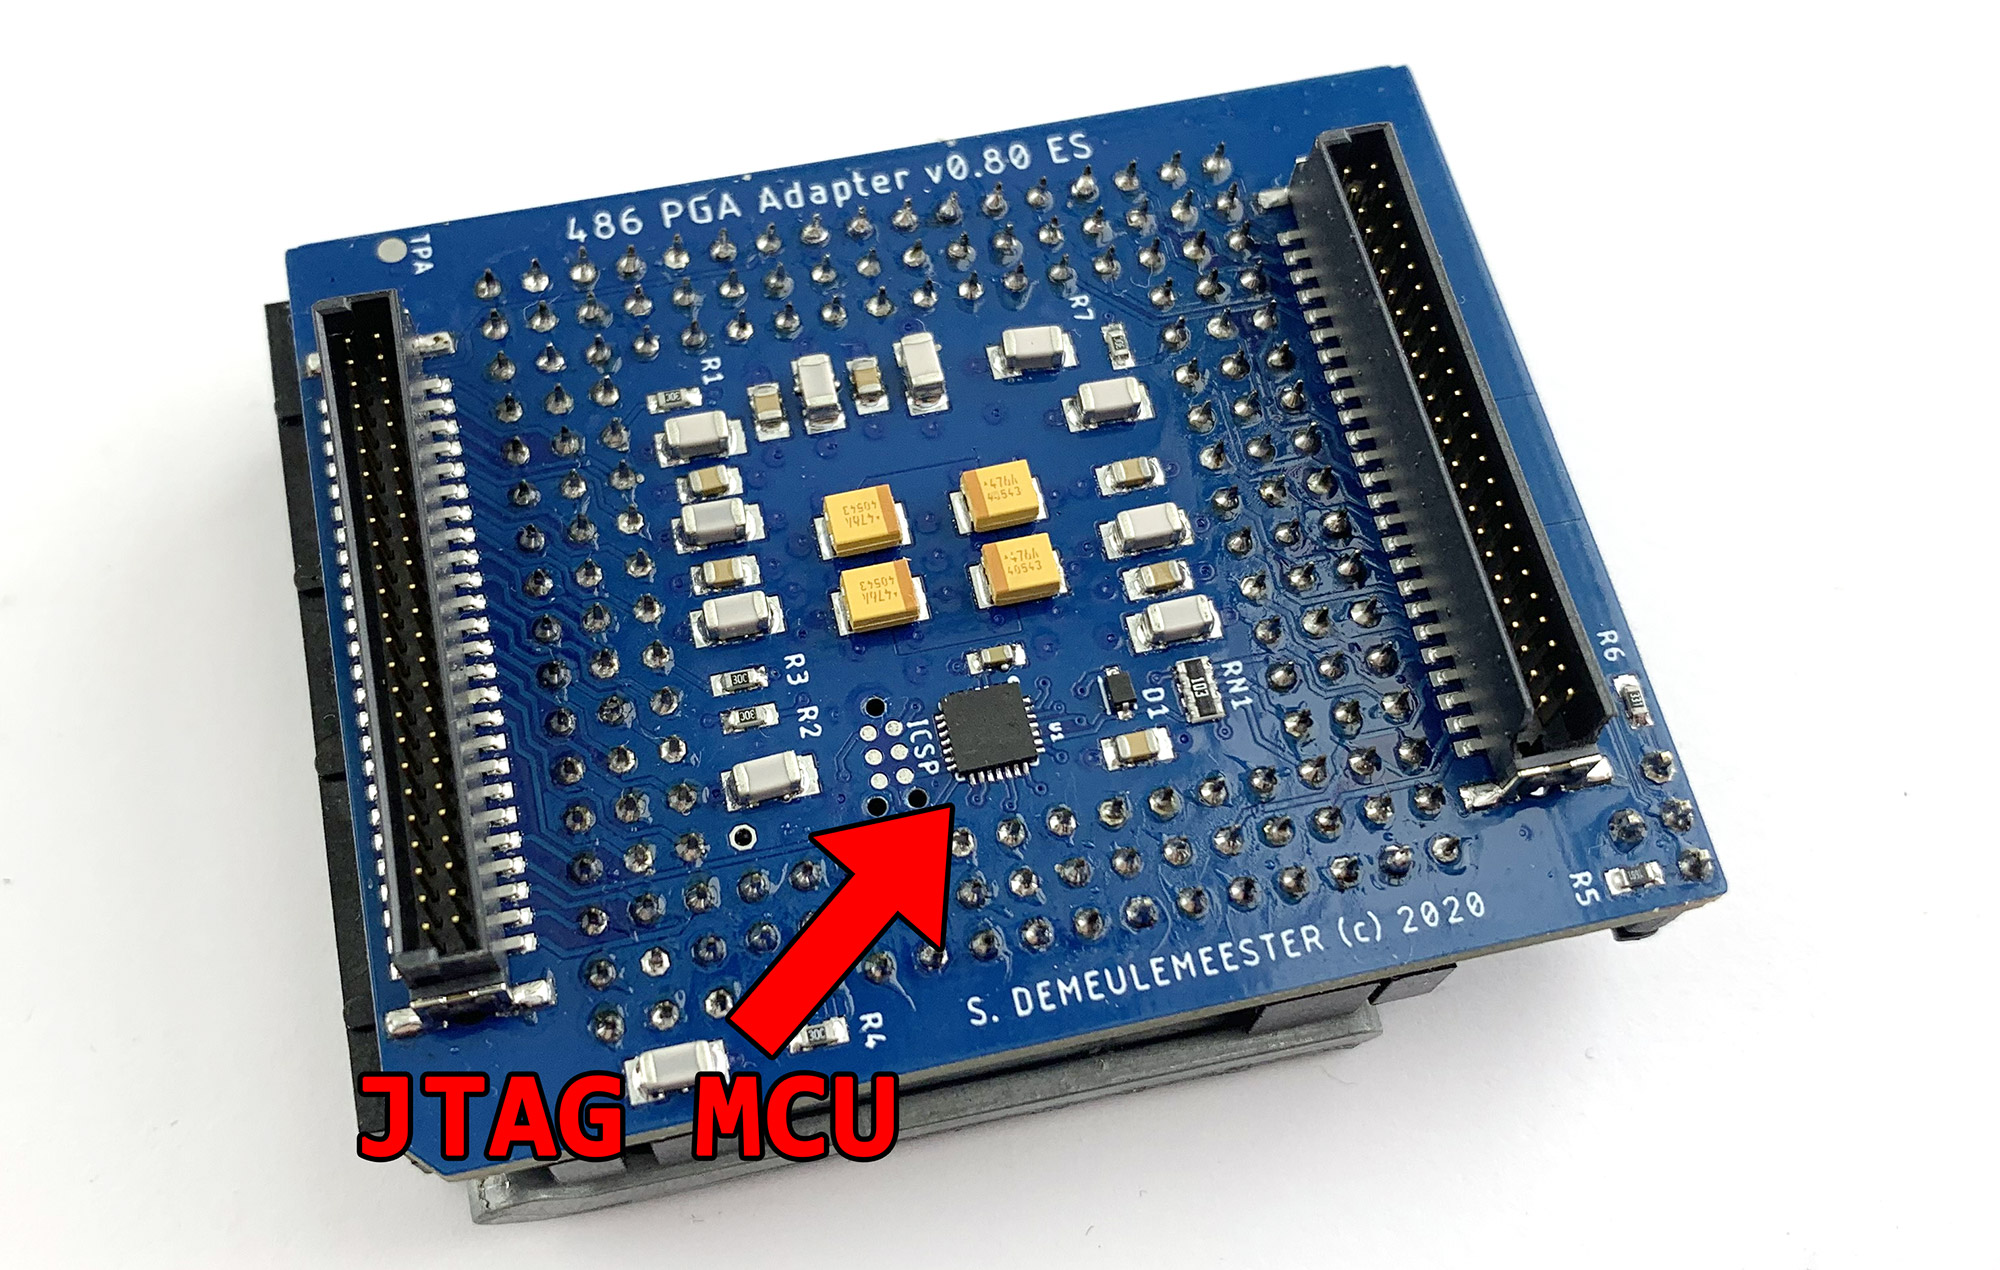
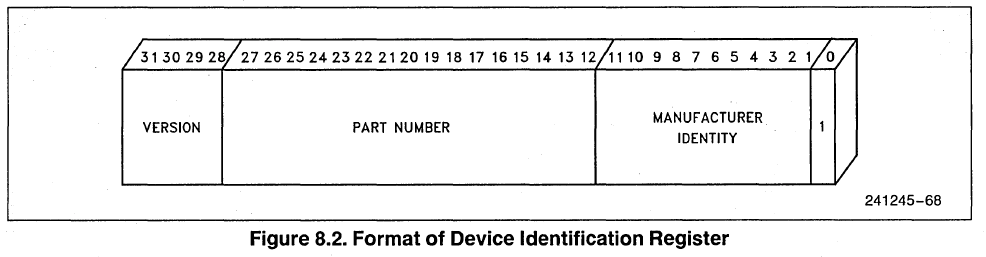 The Manufacturer Identity is a 11-bit value linked to the chip manufacturer: 0x09 for Intel and 0x01 for AMD. That’s how you can distinguish between an Intel and AMD 486. JTAG is not available on Cyrix, TI and UMC 486s, but these CPUs don’t use the Intel Microcode and they have other identification methods. Accessing the IDCODE register to distinguish AMD and Intel 486s requires specific hardware. Due to limitations in I/O lines available from the FPGA and the tiny space available on the PCB, I chose to add an extremely tiny ATMega328P-MN (0.5 mm pitch!) on the 486 Adapter to access the JTAG port:
 The code for bit-banging JTAG commands and communicating with the JTAG controller was quickly written, thanks to this blog that published a nice proof-of-concept many years ago. I then added the link between the FPGA and the outside world to grab the JTAG data from the Windows companion tool. I took the opportunity to rewrite almost all the communication stack between the Universal Chip Analyzer, its integrated MCU and the FPGA. Let’s try with some real-world 486s!
* AMD Am486DX2-66NV8T
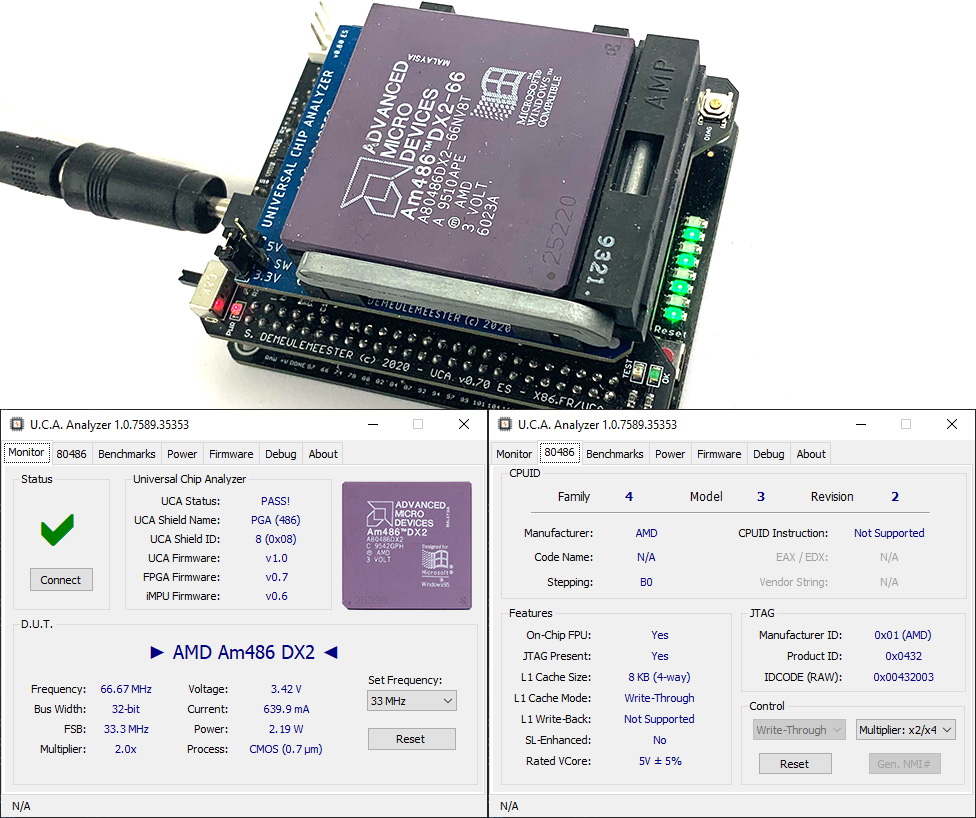 The JTAG IDCODE register reported (0x00432003) strictly follows Intel’s datasheet:
-
-
- Bit[0] = 1 (JTAG constant)
- Bit[11:1] = 0x01 (AMD’s Manufacturer ID)
- Bit[27:12] = 0x0432 (Part Number = CPUID Family/Model/Revision)
- Bit[31:28] = 0 (Revision not set)
-
As expected, the Part Number filed by AMD is the same as the value reported in the DX register just after boot. All Am486s I tested follow this scheme. I noted that the value reported on the JTAG IDCODE register changes with features activated (2x or 3x multiplier, WT or WB cache mode) just like the CPUID value.
* Intel 486DX2-66
Here is the most interesting part. For some reason, Intel does not follow its own public datasheet on most of its CPUs. Many Intel’s 486-era datasheets show the JTAG bit order as previously described, but the real value returned by many CPUs I tested often reports a totally different organization (only described properly on a printed Intel Datasheet I own).
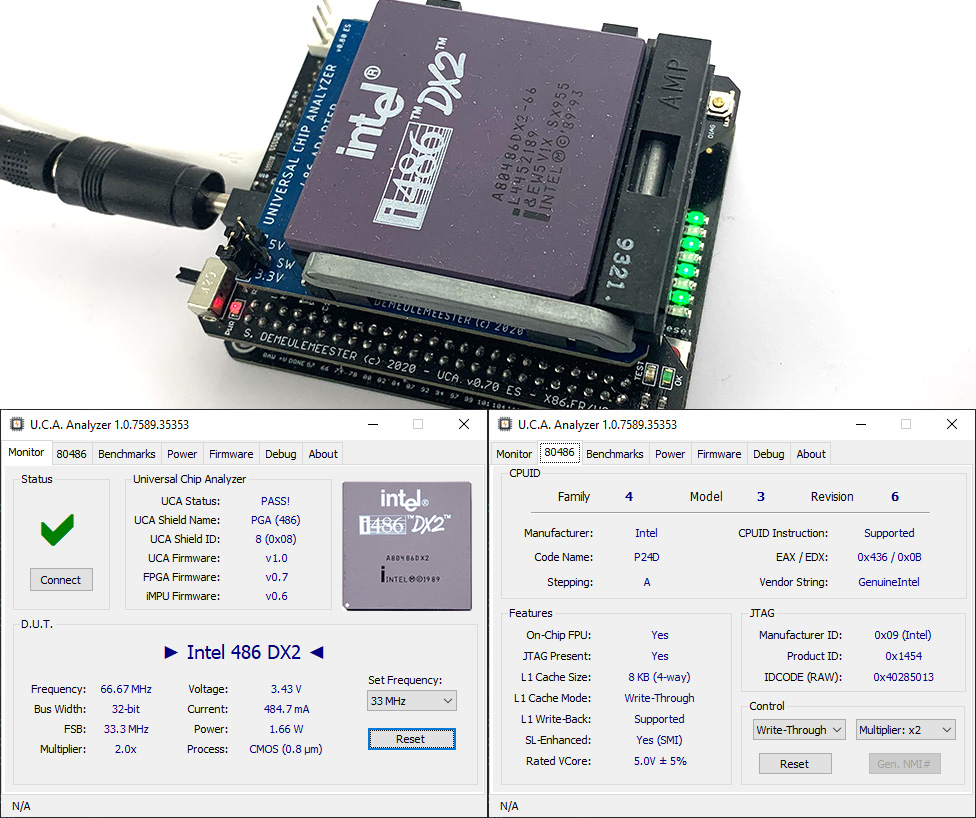 The raw JTAG IDCODE register value reported on an early i486 DX2-66 (SX626) is 0x00432013 as expected, but a late one (SX955) returns another encoding: 0x40285013. It decodes as follows:
-
-
- Bit[0] = 1 (JTAG constant)
- Bit[11:1] = 0x09 (Intel’s Manufacturer ID)
- Bit[16:12] = 0x05 (Proprietary Model Code)
- Bit[20:17] = 0x04 (CPUID Family, 0x04 = 486)
- Bit[26:21] = 0x01 (Intel Architecture Type, 1 = x86)
- Bit[27] : 0x00 (Core Voltage – 1 = 3.3V / 0 = 5V)
- Bit[31:28] = 0x04 (Proprietary Revision Code)
-
The Model Code reported in the 5-bit field in bits 16:12 is different than the 4-bit “Model” code read in DX at reset. Here is what I noted:
-
-
- 0x01 = 486 DX
- 0x02 = 486 SX
- 0x05 = 486 SX2 or DX2
- 0x07 = 486 DX2 w/ WT Cache
- 0x08 = 486 DX4
-
Support for JTAG is definitely an interesting feature to dive deeper in the 486 architecture. As for today and as far I know, the Universal Chip Analyzer is the only hardware or software tool to distinguish between an Am486 and an Intel 486.
More UCA news soon!